Showing posts with label food. Show all posts

Wednesday, July 30, 2014

Garden Breakfast: Kale & Squash Blossom Omelette

So in one of my garden boxes, I just let whatever was in the compost sprout. That turned out to be squash, squash, tomatoes, squash, tomatillos, squash, squash, and squash. Though most of the squash are winter ones (I think?) they are still producing a huge amount of the fragile, tasty delicacies that are squash blossoms. Squash blossoms are a great reward of having a garden - they're expensive to buy and not of the best quality, since they start to wilt as soon as you've picked them. Grow your own, and eat like people pay to in restaurants.


I wake up, I'm hungry, I go out to the garden and pick the stuff that needs picking. Good heavens, that's a lot of greens. Stay tuned for greens recipes.


Ingredients

  • 5-6 eggs
  • 2 cups squash blossoms (if you don't press them down)
  • a good handful of kale or other green
  • a shallot or small onion
  • 2 cloves garlic
  • some kind of sharp cheese; I used cotija, I've also had good results with goat cheese. Feta would work nicely.
  • Whatever else you get from the garden that day. I used broccoli. You could use tomatoes. Really it is hard to go wrong.


Instructions
Mince the garlic and the shallot. Fry in oil or butter until transparent.

Add the squash blossoms. Fry on medium heat until wilted and soft.

Push the vegetables out of the pan and crack the eggs into it. (Or you could mix them eggs up beforehand; I like the contrast of yolk and white that you get if you break the yolks after they've started to cook. You'll want to make sure the pan is not too hot.

Once the eggs have turned opaque but have not yet finished cooking, lay the cooked vegetables down in a line on one side of the eggs.

Wash the kale or greens and lay a layer of leaves over the top of the squash blossoms. Let the heat soften them a little bit, then put on your last layer of vegetables - here, broccoli. Sprinkle on some sharp cheese.


Gently fold over the top of the omelette and let it cook until set. Serve with hot sauce.


Tuesday, June 10, 2014

Sort of Sushi


First of all, get it out of your head that I'm going to tell you how to make the sort of sushi you're familiar with. Not restaurant sushi. Not grocery-store sushi. Not even convenience store sushi (and I'm not judging you for being familiar with that; we've all made questionable choices in convenience stores and we're stronger people because of it). No, this is what happens when I make an attempt at a particular dish over and over again, until it gets into an idiosyncratic but highly satisfying final form, one that's adaptable to myriad what-I've-got-in-the-fridge situations and one which offers the possibility of further adaptations yet undreamt of.

Second, your two objections, addressed:

  1. But isn't sushi raw?! Are you trying to give me salmonella?Even I wouldn't eat raw fish I'd prepared myself, and I have an iron stomach and a taste for adventure. Nope. Nothing raw in this except the vegetables.
  2. Sushi is, like, the definition of expensive food! I thought you were into affordable stuff!
    This is one of those dishes that can be priced up or down depending on what you want to put in it - kind of like a sandwich. At the heart of it, my Sort of Sushi is grain+vegetables with a bit of fish in for flavor, and that's a recipe for affordability. 
All right. Are we good? Onward!

Ingredients:

For the Rice
  • 2 cups rice (You can use sushi rice, of course, which isn't hard to find though it can be expensive. You can also use short-grain rice, and I've tried it once with arborio rice with a high degree of success. This time around I used quinoa, which worked just fine. Whatever grain you go with, don't buy it in those little pre-packaged bags. Go round to the bulk food aisle.)
  • 1/2 cup rice wine vinegar (If your regular store only sells one kind of this, it's probably overpriced. In fact, it's worth hitting up an Asian market in your area to stock up on staples you're going to be using)
  • 1 tbps sugar
  • 1 tsp salt

My fillings
For the Filling (pick 3-5)
  • Avocado
  • Cucumber
  • Carrot
  • Smoked salmon
  • Canned Salmon
  • Nice Canned Tuna (by which I mean, step it up a grade from the tuna-salad stuff. It's worth the extra expense and doesn't taste like grade school.)
  • Barbecued eel (if you're prepared to splurge)
  • Imitation Crab Sticks (if California rolls are your jam)
  • Fried fish from the grocery store steam table (WHAT. It is delicious.)
  • Fried egg (further details on the frying to follow)
  • Cream Cheese
  • Further Items as Inspiration Strikes or the Fridge Warrants.

For the Rolls
  • Sheets of nori seaweed (look, you're going to have to go to an Asian market for this. They might have them in your fancy hippy store like Whole Foods but I will bet you dessert they're overpriced. Go ahead, get a big pack of them. You'll be making this a lot. And if for some unfathomable reason you don't, then you can just snack on them out of the bag)
  • Sesame seeds

For the Garnish
  • Wasabi (powder or paste, whichever you can find first/cheapest)
  • Soy sauce
  • Pickled ginger (you can totally pickle this yourself, by the way; it's a disgracefully easy refrigerator pickle, but I'll save that for another post, ideally after I've gotten a mandoline or better knife skills)

Rice Cookers: Get One
If you're using rice, soak it for half an hour. You want it to get all mushy and sticky when you make your rolls, the better to hold together. The quinoa you can just stick in the rice cooker. (Get a rice cooker. They're one of those kitchen appliances that you can get brand new at yard sales and thrift stores because people like to give them as gifts. If you are like me and find new ways to ruin rice every time you cook it, a rice cooker is absolutely worth $5 and/or getting married and putting one on your registry.) Cooking should take about 20 minutes, rice cooker or no rice cooker. In the meantime....

Start cutting up your vegetables. Cut 'em into matchsticks. Nice and skinny. You're going to be rolling these up; make 'em too chunky and they will fall right out or be hard to bite through. Practice your knife skills. Have some fun.

Prepare your protein. If you're using a canned fish, I like to mix it with a little mayonnaise (not as much as you would add for a tuna salad, just enough to get the fish to hold together when you stir it up) and then add a dash of teriyaki sauce, sesame oil, and/or hot sauce. Do this to taste; you're going to be eating it.

If you want to prepare an egg or two tamago-style, here's a tutorial. Definitely worth it if you're going for presentation and authenticity! I, on the other hand, am lazy and almost always out of mirin, so I just put a dash of rice wine vinegar in when I'm beating up the egg, put a drop of sesame oil in the pan, fry the egg gently on low heat, cut it in strips, and call it a day.

Why use white sugar
when you can use raw or brown sugar?
Hey, the rice should be done now! Check and see if it's nice and sticky. If it is, take if off the heat, and mix together the vinegar, salt, and sugar. Add the mixture to the rice and mix it in thoroughly. Let it cool. (This is another delay in the process. If it's winter, I like to stick it outside.) Go chop up some more things, and get out your rolling equipment!

You don't actually need a sushi-rolling mat to make sushi rolls. You just need something firm but flexible enough to roll up. I had perfectly fine results with plastic placemats for years. But the sushi-rolling mat is fun. Get someone to give you one of those kits for a birthday present, and you're set. Or add it to your registry, since you're already getting married for a rice cooker.

Ready to roll
Get a square of nori and set it down on your mat, shiny side down. Get yourself the sharpest knife you've got, and a little bowl of lukewarm water. Get your rice, and spread it over the seaweed, leaving about an inch near the top uncovered at the top. Don't try to spread it like butter; you may tear the seaweed. Squish it down with your fingers or the back of a spoon. Is it sticking to your fingers? That's why I told you to get the water. Rinse your fingers off but don't dry them. A bit of water will help as you squash down the rice in a nice even layer, maybe 1/4 inch deep, over the seaweed.


The quinoa wasn't as sticky as I'd like, and got all over the place.
Add your fillings! This is the fun part. Lay your fillings in a horizontal line across the rice about 1/3 of the way up. Mess around and see what combinations you like! Smoked salmon and cucumber is classic. So is eel and avocado. But I find it's hard to make something that really doesn't work. If you're using something that's wetter than other ingredients, like your canned tuna or salmon mixture, be sure not to put too much of it on there. And one creamy ingredient, like avocado or cream cheese, is usually enough. Don't fill it too full. You're going to be rolling all this up.

Cucumber, cream cheese, salmon
Cucumber, tuna, carrot
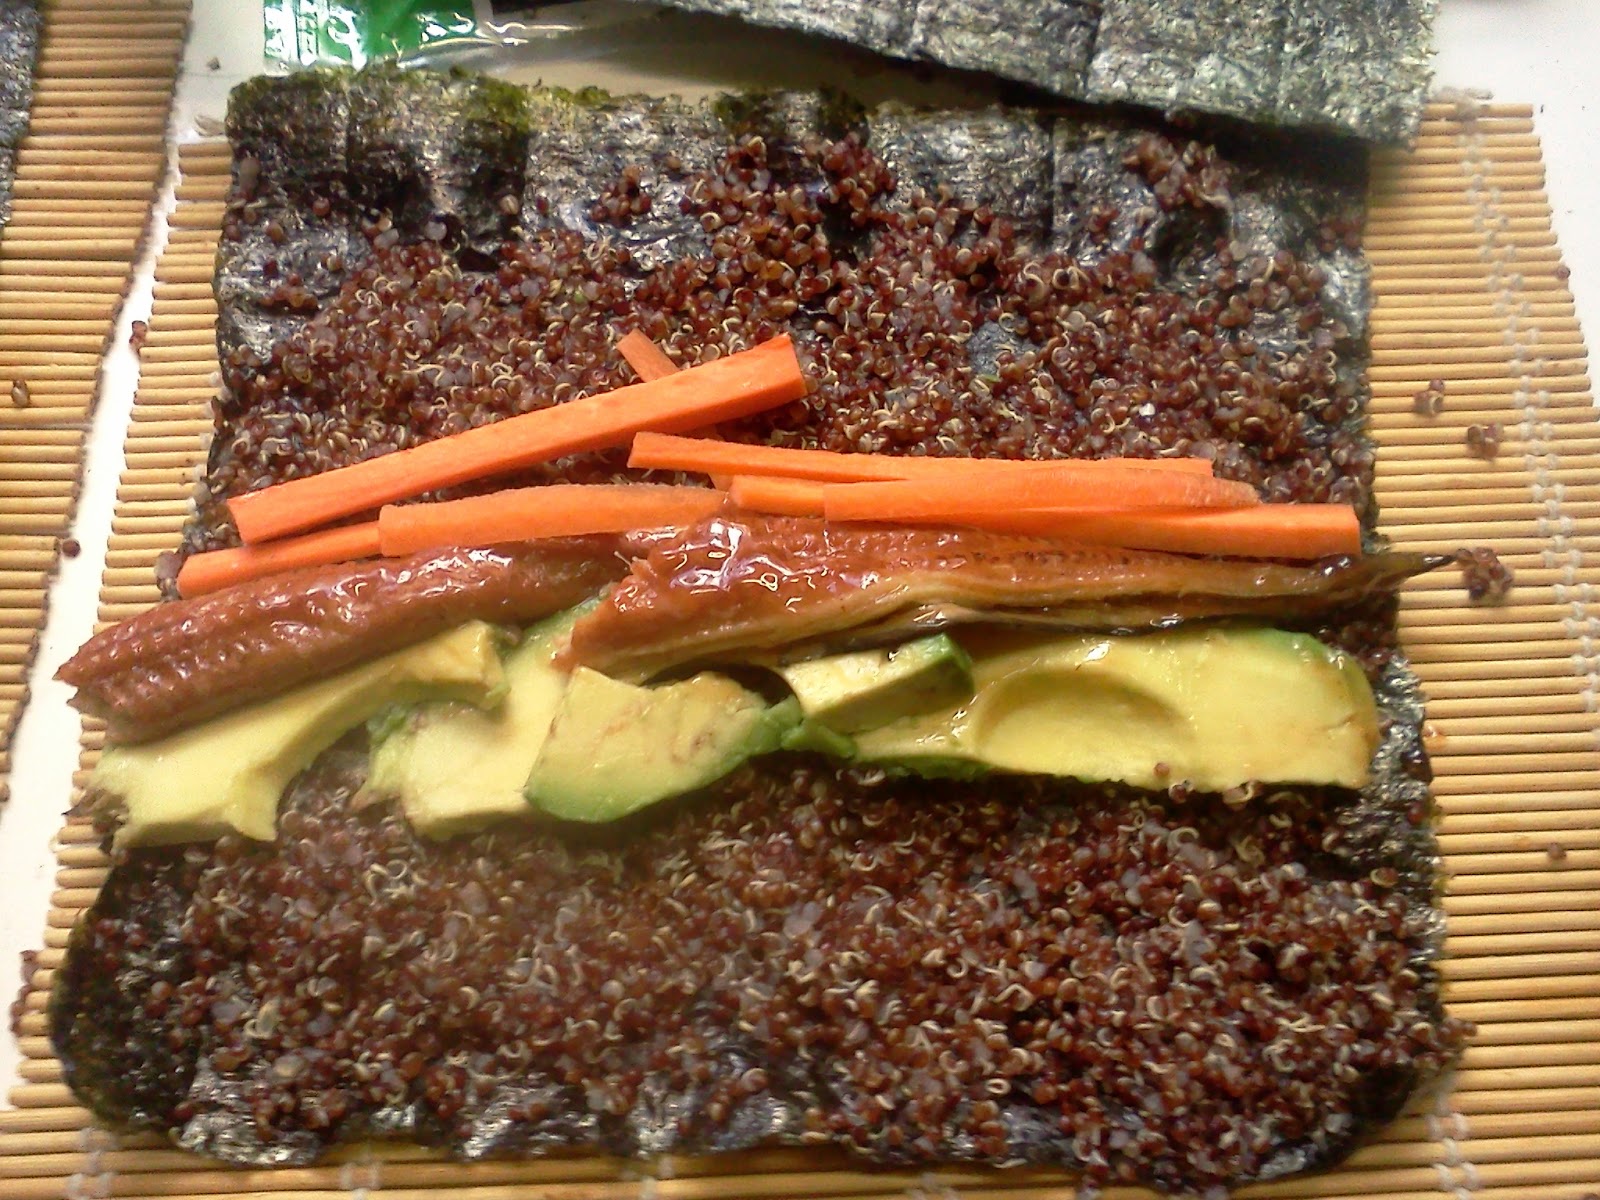
Carrot, eel, avocado
Starting at the bottom of your mat, roll up the seaweed and rice around the fillings. Dip a finger in the water, and run it across the strip of seaweed you left bare at the beginning. When your roll gets up to the top, press the dampened strip across the roll, just like sealing an envelope. Wrap your mat around the roll and squeeze the whole thing together. If ingredients pop out at this stage, you either made your roll too loose or you're squeezing too hard.

Run your sharp knife under water briefly, then slice your sushi-log into rounds - 6-8 of them. Don't press the knife down, you'll squash it. Draw it towards you. 

Repeat until you are out of everything. If you have anything left over or if any of the rolls fall apart beyond salvaging, chop it up, put it on lettuce, and call it a salad. Serve it on little dishes, provide soy sauce and wasabi for dipping and pickled ginger because pickled ginger is great and should be served all the time.

Eat 'em with chopsticks. It's more fun.

Price: 
Quinoa: $2
Nori: $1.50
Carrots: $.25
Cucumber: $.50
Avocado: $.50
Smoked Salmon: $1
Cream cheese: $.50
Eel: $3.25 (told you I was splurging; it cost $6.50 but I used half of it and ate the rest on salad the next day)
Nice Tuna: $.75 (the can cost more, but I only used part of it)
Total: $10.25

Serves: 2-3


Saturday, April 19, 2014

Onion Pie


 I hesitated on this post at first, because first, I'm not great with pies, and second, the volume of butter of required for their crust usually puts them out of consideration for an economical dish. But then there was a ten-pounds-of-onion-for three bucks special at one of the area produce markets, and I obtained a pie crust through mysterious means, (COUGH FREEZER COUGH) so I figured I might as well give this pie a shot.


Fruit pies are, obviously, best made in the summer (or possibly fall) when there is more that fruit than you know what to do with. An onion pie, on the other hand, is entirely suitable to winter or early spring, when nothing is growing so nothing is cheap and there's nothing to do but twiddle your thumbs, have Lent, and wait for things to sprout.

Ingredients
6lbs of onions (yes, really.)
A pie crust (and you're not getting a recipe out of me, go ask someone who's better at it)
3tbsp oil (I used bacon grease, thus disqualifying this from being as vegetarian as it would otherwise be)
A sprinkle of a savory herb (I used thyme)

Get your largest and heaviest pan and start heating the oil in it. Meanwhile, start chopping the onions (medium dice) and throwing them into the oil. Do you need to look as if you have suffered a devastating tragedy, without the trouble and bother of suffering a devastating tragedy. Make this pie.


You're going to be caramelizing all six pounds of onions. Dang.


This means keeping the heat on medium (you'll want to err on the side of lower rather higher). As you add them, stir them well to get them coated with the oil. Then keep stirring them - not frantically, but regularly. This will take at least 30 minutes, but you will have the satisfaction of watching your stew pot full of more onions than you think anyone could possibly eat turn to a rich soft caramel just right for your pie crust. 


Once the whole mixture is as brown as you like, and you can no longer distinguish individual onion pieces, pour it in. You can sprinkle something savory on top to contrast with the rich sweetness of the onions. I tried thyme; you could try parmesan cheese maybe.

Oh, right. The pie crust. Do what you do with pie crusts. Here I got all fancy with it, because why not. It still stuck to the pan. Take my advice on onions. Don't take my advice on pie crusts.


(Except this one prize-winning crust I made this one time with ground walnuts, which come to think of it would go really well with this pie.)

Cost:
Onions: $1.50
Crust: (depends, say $1.50 too?)

Serves: 6-8, but works best accompanied with something. A nice sharp green salad, for instance. 


Monday, March 31, 2014

Salad for Dinner

Learning to think of salad as the main meal rather than a side dish is an extremely useful skill.


Dinner!
Rice, corn, and potatoes are the food of the broke, to be sure, but they are also food for working outdoors all day. So when you need to eat enough to feel full but your level of manual labor doesn't justify a heaping plateful of rice, it's time for an enormous salad.

I learned to make this salad from a good friend, and it has gradually become my favorite kale salad of all time. (I'll post my second-favorite next time cottage cheese goes on sale). Kale is a great base for a dinner salad - it's robust and a little crunchy, it's got enough texture to keep things interesting, and it's got one of the best price-to-nutrient ratios in the grocery store. Add its cousin broccoli to the mix, and I could eat this for dinner every night for a week and be happy.  It also introduce me to a brilliant way to handle broccoli stems.

Broccoli stems are the vegetable equivalent of offal - they tend to get passed over or tossed out, but with a little bit of attention, they yield a quantity of delicious, nutritious, and highly edible food.


Ingredients

Half a small bunch of kale. I like the curly kind best for this purpose.
A head of broccoli
An avocado
An apple. A tart, firm-fleshed one is best.

(these are the essential ingredients, you can add other things like sunflower seeds, crumbled cheese, other vegetables chopped very fine)


Instructions

Wash the kale and chop it finely. (This means that you can also use most of the stems, unless they are particularly woody. Put it in your salad bowl.

A trimmed broccoli stem
Wash the broccoli and trim the stem. Depending on how young and tender the broccoli is, the stem usually has a woody, stringy outer layer. Slice that right off. You don't have to be tremendously precise about it. You're just getting it to a point where you can grate the stem. Chop up the broccoli florets nice and small - you don't want to be picking little trees out of the salad. Add the florets to the salad bowl.


You can see how the stringy bits simply won't grate.
Grate the stem into the salad bowl. Anything that's too tough to grate - I usually leave the outer layer on one side of the stem so I have something to hold onto while grating - discard.


The apple I used was a little too sweet and juicy.
See how it's oxidizing already?

Wash the apple, and grate it into the salad bowl.

Dice the avocado, add it to the salad. Toss, dress, and eat.

(As for dressing, you can use any of your favorites. Because this salad is so flavorful on its own, and has a fair degree of moisture from the grated apple and broccoli stem, I usually add no more than olive oil, balsamic vinegar, and salt.)


Cost
Kale: $.40
Apple: $.35
Broccoli: $1
Avocado: $1
Sunflower seeds: $.25
TOTAL: $3
SERVES: 1-2 (as meal), 4-5 (as side)


Friday, March 28, 2014

Lemon Rose Bars


In an attempt to aggressively assert that it's spring, I decided citrus was the order of the day. And rosewater is the magic trick to make everything taste a little more special. Always be careful with rosewater, a little goes a long way, and it turns into perfume very easily. Lemon bars, it turns out, are super easy and fast and so delicious.


Rosewater Lemon Bars
Adapted from Joy the Baker
Yields about 24 bars, this recipe is easily halved

Ingredients

For crust
2 sticks of butter
1 cup granulated sugar
2 cups flour

For filling
4 eggs
1 1/2 cup sugar
3/8 cup flour (6 tablespoons)
1/2 cup lemon juice (about two lemons
1 tablespoon rosewater
zest from two lemons

Preheat oven to 350. Grease a 13x9 baking pan, line with parchment paper, and grease the parchment paper.

Cream the butter, add sugar, and beat until fluffy. Add flour and mix.

Press into prepared pan and bake for 15 minutes, until lightly golden.

While the crust is baking, whisk together all the filling ingredients. Pour prepared filling over crust and bake for 15-20 minutes, until no longer jiggling in the center, and lightly browned. Cool and sprinkle with powdered sugar.

Lift out of pan by parchment paper and cut into squares. Store in a covered container.

Wednesday, March 26, 2014

Pricing Rules Part 2

Last week I wrote about my internal price book (highly specific to my region, to be sure) but some readers may have noticed that certain categories are missing. There are some sorts of foods that aren't in my price book because I don't often buy them, and here they are.

Things I Just Don’t Buy (preference)
Bread and bread products: Since I don’t usually buy bread products, I don’t have a good idea of what they should cost. I would say that I wouldn’t buy things like tortillas or English muffins unless there were a number of different varieties that I could compare to get a price spectrum.
Cereal: I’m just not particularly attached to it.
Fish: I buy fish so rarely that I don’t have set patterns for it. I’m not good at cleaning whole fish (I was picking tiny bones out of my hands for days the time I tried). I love fish, though, and I try to buy it when it's on sale, if only to soothe my affronted wallet. Canned salmon can be quite good, as an alternative to fresh.

Frozen prepared foods: All I know is that Trader Joe’s frozen foods always fill me with shame, because they are so much better than what I make, and they aren’t supposed to be. There may well be a place for frozen prepared food even in a frugal budget, but they're not something that I've incorporated into my routine so I have no useful advice.


Things I Just Don’t Buy (principle)
Anything in single-serving packets (CHEESE I AM LOOKING AT YOU)
Any adulterated product trying to pass itself off as something else (oil blends, cheese products, spreadable butters, etc.)
Shrink-wrapped cucumbers: Go away. I hate you.
Sweetened things: I’m not going to PAY YOU to put sugar in something. If I want sugar in it, I know where we keep the sugar bowl.
Light things: I'm also not going to pay you to water something down. If I want fewer calories, I'll eat less of the product.

Come to think of it, anything designed to do something that I could easily do myself. I know, that’s not only a highly personal rule, but a moving target. Right now I don’t buy cookie or cake mixes because that’s just way too easy to make myself. One day maybe I won’t buy orange juice because that’s way too easy to make myself? We'll see.

Those are my rules of thumb. What are yours?

Friday, March 21, 2014

Waffles of Substance

I've tried these a couple times now, and I have to say, the best way to make these is with a Belgian waffle iron. Honestly, why don't you have a Belgian waffle iron already? Kitchen appliances are one of the easiest things to get used - people are forever giving away the kitchen things they don't know what to do with. Hold out for a Belgian waffle iron; this recipe yields a tender and substantial waffle that stands up well to the heavy demands of the Belgian format.

I don't have a Belgian waffle iron. I have the old waffle iron my brother left me when he moved across country. It's all right, but I haven't yet found the perfect waffle recipe for it - the one that will thread the thin line between crispness and tenderness, that will be substantial without being heavy, and light without being burned. This is a good recipe, but in a standard waffle iron like the one I'm using, it can run to the soggy unless it is fresh, fresh, fresh! So get the family around to gobble these up as soon as they come off the iron. If you don't have a family, invite your friends over. Waffle day! Now, I believe that these should stand in for a meal, not for dessert, and these will do admirably.


- 3 eggs, separated
- 2 1/4 c plain yogurt
- 1/2 tsp baking soda
- 1 Tbsp honey
- 1/3 c quick-cooking oats
- 1/3 c cornmeal (you can add other things here. In my case, I ground golden flaxseeds and did half-and-half with cornmeal)
- 1/3 c butter, melted, or vegetable oil.
- 1 c unbleached all-purpose flour
- 1 Tbsp baking powder
- 1/8 tsp salt (optional)


- Combine the egg yolks, yogurt, soda, and honey in a large bowl. Beat with a wire whisk.
- Stir in the oats and cornmeal, then add the butter and stir again.- Sift in the flour, baking powder, and optional salt. Beat well, then cover the bowl and let the mixture sit for 15 minutes.- Beat the egg whites until stiff, then fold them into the mixture. If the batter is too thick, add 1-2 Tbsp milk or water (I used water if I've used full-fat yogurt, otherwise milk)

Yield: 8 (10-inch) waffles

Wednesday, March 19, 2014

Pricing Rules

I mentioned advanced techniques for the Grocery Game the other day - one of the most useful, time-savey ones is the mental price bank.

A lot of brains are really, really good at keeping track of this sort of thing. Do you drive? Think about filling up your gas tank. When you approach a gas station, do you automatically have a sense of “Hey, this is higher than I paid last week!” or “Woohoo, it’s gone down, time to fill up!”. If so, you’ve got in your head a smaller and occasionally alarmingly imprecise version of those computer algorithms that tell brokerages when to buy and sell on the stock market.

Most of this is unconscious for me. I just think “Pfft, too high,” or “Hey, now that’s a sale! Stock up!” But there are some pretty specific numbers attached to it, and here they are, dragged up fresh from under the surface of my mind.

Standard Cheese (cheddar, mozzarella, swiss)
Over $6/lb: Don’t buy
Under $3/lb: Is something wrong?

Milk:
Over $3/gallon: don’t buy regular
Over $3/half-gallon: don’t buy organic

Eggs:
Over $2/doz: don’t buy industrial
Over $3/doz: don’t buy cage-free/organic
Over $4/doz: don’t buy local

Canned Goods
Over $1/can: don’t buy

Dried Beans:
Over $1/lb: don’t buy.

Greens:
Over $1/lb: don’t buy. (This $1.29 stuff is nonsense. We are talking about collards, people.)

Onions and Potatoes
Over $1.50/3lbs: don’t buy. Check for mushiness though.

Most other veggies:
Over $2/lb: don’t buy standard

Spinach:
Over $2/unit: don’t buy (unless the unit is one of those big containers of washed baby spinach, in which case you can go up to $4)

Frozen Veggies in a Bag:
Over $2/bag: don’t buy. (Exceptions made as bags get larger. And don’t buy those little bitty bags. No one needs those.)

Apples:
Over $2/lb: don’t buy (no, not even the organic local ones, unless you are particularly in the mood to support your farmers, in which case knock yourself out!)
Under $1/lb: What’s wrong with them?

Yogurt:
Over $3/tub: don’t buy. (The little fruit on the bottom things are usually a ripoff even on their frequent sales, though if they are convenient enough that it’s worth it to you, go for it!)

Wednesday, March 12, 2014

The Grocery Store Video Game

If I had kids, I’d like to take them grocery shopping; teach ‘em how to play the Great Grocery Game. Really, the whole grocery store is like a video game, although the educational kind rather than the kind where you can kill aliens. (Now there’s a way to get kids excited about grocery shopping...) Think about it. You have a certain amount of points you can spend (we could even call them dollars or something) a variety of items you need, and a bunch of distractors trying to get you to make choices that will serve not your interests but their own. This is the Grocery Game! It’s you versus the market - but you can win!


The same way you learn right quick to spot an extra life or a save point, you should be able to spot the sale tags in an aisle or pick out the store brand in seconds. It’s usually the one without any fancy coloration; alternately (especially if you are in a store for the first time) it’s the brand you don’t recognize. Just let your eyes glide right over everything they already know, and catch on the one you don’t recognize.


Once you’ve spotted the sale tag (o my hypothetical child), it’s time for the Stock Check! Is this item on your list of Things We Usually Need? If it’s not there, is it on the list of Things It Might Be Cool to Try? Great! Now it’s on to the Lightning Math Round! Does this sale put it below the store brand or comparable items? Price per unit is usually there on the sign; to try and trip you up during the Lightning Math Round sometimes the unit something ridiculous and random like “pack”. Or it will be in ounces while everything else is in pounds. You don’t need to know the exact answer - it’s just like those GRE math questions where all you have to know is if B is larger, smaller, or the same size as A.


Look, hypothetical child, we’re not just winning the grocery game, we’re doing GRE prep! Man, you are going to be the smartest hypothetical child!


Package sizing is another puzzle to watch out for. If you see an item that is notably cheaper than its comparables, check the package sizing. Is it an 11 oz bag of tortilla chips while everything else is 13 oz? Is it a 64-square roll of toilet paper while everything else is 100? These are some sneaky things - you will think you have beaten the grocery game, but in fact the final boss (CAPITALISM) is laughing at you.


What?! Hypothetical child, get out of the cereal! No, I’m not going to buy you a candy bar! Stop screaming, everyone’s staring at us! Look - um - quick, tell me which brand of coconut water is cheapest!

Can’t take you anywhere, hypothetical child.

Tuesday, March 11, 2014

Homemade Vanilla Extract Part 1

Sure, you can buy vanilla extract at the grocery store, but how much more awesome is it to be able to make it yourself? It's easy and delicious.

I buy vanilla beans online, from Beanilla, in a kit that comes with a bottle. It's easy, slice the beans in half and cover in alcohol and shake the bottle once a week for two months. (If you decide to go another route than using Beanilla's kit, the ratio I've successfully used is 3 beans to 1 cup of liquor.)

This time around, I am expermenting with the flavor difference of using vodka and bourbon. You know, for science.

In two months, I'll report back on whether or not there seems to be much of a flavor distance in baked goods. Probably meringues, which really show off the flavor of the vanilla. But I have two months, so we'll see. For now... a picture of the extracts on day one.


Monday, March 10, 2014

Endlessly Useful Granola


Maple-walnut-apricot
If there is one thing you should not be paying other people to make for you, it is granola. (Exception, of course, if I persuade my mother, whose formula this is, to start selling the stuff: that you should definitely buy!) Buy your ingredients in bulk and bake it yourself; an hour's worth of work can stock you up for a month. This recipe isn't so much a recipe as an algorithm. It's endlessly adaptable to whatever you have in your cabinets, whatever your taste is, and whatever's on sale at the moment.


Coconut-cashew-cranberry-chocolate
INGREDIENTS

6 Cups Granola Stuff:  Oats, coconut, sunflower seeds, peanuts, walnuts,
almonds, sesame seeds, etc. 2 -3 cups of this should be oats or a flaky thing - I've used rolled wheat and rolled quinoa on occasion. 
1/2 cup butter or coconut oil
1/2 cup honey (can substitute part molasses or maple syrup)
1/4 cup sugar 
1/2 tsp vanilla
spices to taste. I like ginger and cinnamon.
1/2 cup dried fruit and/or chocolate chips

Toast the granola stuff on an ungreased baking sheet for 20 minutes at 300ᵒ F, stirring occasionally. 

Meanwhile, heat the butter or oil, honey, and sugar in a saucepan. Stir well to combine. If you like, you can add 1/2 c peanut butter. Simmer but don't boil, at least not if you want to get your pot clean. Add vanilla if using. Combine the liquid and the lightly toasted mixture, stir until well mixed. Add spices if you're using them.

Pre-bake
Put the mixture back on the baking sheet. If you want it to stick together, pack it down. If you like a looser granola, break it up. Bake the combined mixture for 20 minutes at 300ᵒ F, stirring occasionally. Don't overbake - it will harden up as it cools. Remove from oven and let cool. As it cools, add chocolate chips and/or dried fruit.


I made two types of granola on this go-round. The first was oats, sunflower seeds, flax seeds, cashews, sesame seeds, coconut, and almond, held together with oil and honey, garnished with dried cranberries and chocolate chips. The second was oats, wheat bran, peanuts, walnuts, and ground flax seeds, held together with butter and maple syrup, garnished with apricots.

All the ingredients were bought in bulk, so the prices are approximations:

In the oven
Oats: $1.50
Wheat Bran $.10
Cashews $2
Walnuts $2
Peanuts $.50
Maple syrup $1
Butter $1.50
Flax seeds $.50
Honey $1
Sugar $.25
Cranberries $.75
Coconut: $.75
Apricots $1
Sunflower seeds: $.75
Almonds: $.75
Sesame seeds: $.25
Chocolate chips: $1.25

TOTAL: $15.85 (steep for a meal, but consider this will provide about a month's worth of breakfasts. Half a month if you also eat it for snacks. $1/day for some pretty energy-dense stuff.)


Saturday, March 8, 2014

Nutella Stuffed Browned Butter Chocolate Chip Cookies

I have, over the years, made tons of chocolate chip cookies. It used to be, I was a strict adherent to the Nestle Tollhouse cookies, and, really if you want a delicious and uncomplicated chocolate chip cookie, go with that one. (Just use better chocolate chips.)

But recently, I have learned the magic of browned butter in cookies. I don't know who started this idea, but whoever it was was a brilliant person. The browned butter adds a complex nutty flavor. And, what isn't made better with Nutella? These are a bit more complicated to make than basic cookies, and your hands get super messy, but they are totally worth it.

You know you want to eat these.


Nutella Stuffed Browned Butter Chocolate Chip Cookies

adapted from The Ambitious Kitchen
makes 3 dozen cookies

1 c (2 sticks) butter
1 1/4 c brown sugar
1/4 c white sugar
2 eggs
1 tablespoon vanilla extract
2 1/4 c flour
1 1/4 teaspoon baking soda
1/4 teaspoon salt
12 ounces chocolate chips; I use Ghiardelli milk chocolate chips
1 jar of Nutella, refrigerated until hard (you won't use the whole jar)
Course ground sea salt for sprinkling on top

Melt butter on stove, and watch it foam. Twirl the pan and watch the bottom start to turn brown. Remove from the heat when it is copper colored and put in the bottom of your mixing bowl. It is very important to remove the butter from the pan as it will keep cooking and burn. Allow to cool for about fifteen minutes. Mix in both sugars until smooth. Add eggs and vanilla and beat until smooth.

Add dry ingredients and mix. Add in chocolate chips.

Cover and refrigerate for at least 2 hours.

Using a large spoon, measure approximately 1 tablespoon of batter and form into a ball. Then flatten between the palms of your hand so you have a disk. Spoon approximately 1 teaspoon of Nutella into the disk, then pull the sides up to reform the ball. Repeat for all cookies.

Bake at 350 for ten minutes. They are going to come out of the oven looking a little raw, but you're not going to take them off of the tray right away, so they'll continue to cook. Sprinkle with sea salt immediately after taking them out of the oven.